Feeds:
Posts
Comments

Posts Tagged ‘arts’

Picasso inspired clay tiles

This is a great clay project the children thoroughly enjoyed doing. It was inspired by a clay tile my son did at school years ago, I still have the it hanging pride of place in the house.

We looked at Picasso’s Cubism paintings and the children set about drawing a face in that style. Afterwards we got stuck into making the tiles. The children were able to use different tools to add texture to their tile. Holes were made in the top two corners so that a hanging loop could be attached (I have used fishing wire). Once dry the tiles were painted with poster paints and varnished with PVA glue.

Picasso inspired clay tiles

Designing the clay tile

Picasso inspired clay tiles

Colouring the tile design

Picasso inspired clay tiles

Carving the design into the clay

Picasso inspired clay tiles

Adding detail to the tile design

Picasso inspired clay tiles

Clay tile design ready for painting

Picasso inspired clay tiles

Picasso inspired clay tiles

Adding the final touches to the tile

Picasso inspired clay tiles Picasso/Cubist inspired tile Picasso/Cubist inspired tile Picasso/Cubist inspired tile Picasso/Cubist inspired tile

Read Full Post »

Keith Haring art project

This project was a hit with the kids, they really connected with the characters Keith Haring created. This particular art project included lots of different processes which the children found interesting. The end results were super pictures that the young artists were very proud of.

We started off discussing Keith Haring art, touching on semiotics, the colours he used etc. Lots of information & ideas can be found on this great site haringkids.com

As a warm up and a bit of fun I played some 80’s rap music and the children took it in turns to dance, when the music stopped others would sketch their poses. I created a worksheet with Haring inspired drawings of characters that the children could paint, this helped them to understand that we weren’t drawing ‘stick men’. Follwing on from this, the children developed their posed sketches with a view to created a couple of figures they could paint on some foil coverd board.

Once they had drawn their own characters, they needed to think about composition. They drew around the foil covered board onto some tracing paper and traced their characters in an interesting way. Once happy with the layout, the tracing paper was placed on top of the foil board and the figures traced around (this leaves an impression on the foil that the children can then paint).

Next the children used a black Sharpie to trace around their characters. Poster paint was mixed with washing up liquid and the children painted their figures. The foil board was placed on a larger piece of cartridge paper and the perimeter traced around. Using a Sharpie the children created a border of shapes & signs. The foil board was then glued to the paper with the border. Next the children covered a couple of pipe cleaners with foil pieces which they bent into the shape of another figure (some found it easier to follow the contour of a previously drawn character, using small pieces of masking tape to help the wire retain it’s shape). Small cut squares of foam-board were covered in foil, these help to make the wire figure ‘stand away’ from the foil board, most children only used two or three. I used a glue gun to adhere the foam foil squares & wire figures to the board.

Finally the artwork was mounted on black card and displayed for all to see, the reaction was WOW!

Read Full Post »

Impressionist painting for kids

Here are some paintings that the Art cabin students have been working on over the last couple of weeks. After a brief introduction about Claude Monet and the Impressionist painting style, the young artists (aged from 5-11 years) began to paint their own interpretation of the Poppy Field near Argenteuil.

It’s worth noting that we used watercolour paper that was taped around the edges with masking tape. The children brushed clear water across the paper to stretch it. We also used an hairdryer to speed up the drying process.

For this project we worked in stages, beginning with an underpainting (this helps the children work out the composition of their painting, it’s not the finished item so adjustments can be made). The children mixed a blue wash for the sky. Using a wide brush with a side to side motion they applied the wash to the paper. Next adding yellow to the wash to make green, they applied a green wash for the grass. After this stage they added red to the wash to make brown to underpaint the trees & people.

For the middle stage of the painting the children worked with poster paints without the use of water so that the paint remained thick. Dipping a wide brush in blue paint then white, the brush was swirled & dabbed on the paper to create a textured sky.

For the grass, the brush was dipped in yellow and blue paint and swirled about as before, to create a textured field. For the trees the children mixed a dark green colour (they were given a tiny amount of black for this).

The last stage of the painting, using small brushes the children could add flecks of yellow & light green for the highlights. Adding more details to the people, house and finally the red poppies.

Once the paintings were dry the tape was peeled off to reveal a neat border. The children have had many compliments on their paintings which has really boosted their confidence.

Impressionist painting for kids

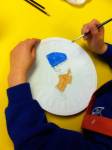
Showing the different stages of painting

Impressionist painting for kids

Impressionist painting for kids

This was my effort!

Impressionist painting for kids

Impressionist painting for kids

Read Full Post »

Queen Nefertiti plate painting project

A completed work of art

What a coincidence that someone donated these plates to the school where the Art cabin is based, and we happen to be working on an Egyptian project. They depict the very beautiful Queen Nefertiti who was the Royal wife of the Egyptian Pharaoh Akhenaten.

The children just used ordinary poster paints (we didn’t have any ceramic paints), fully aware not to wash them or eat off of them!

Read Full Post »

Making a Mummy and Sarcophagus

model of a Mummy in it’s Sarcophagus

The new term starts next week, and we have a great model-building project lined up. Since we are now situated in the library, it’s hard not to be influenced by the books that surround us. One day last term I was sat near the Egyptians section of ‘People in History’ and started to leaf through a few books.

I thought it would be great if the children could make their own Mummy and Sarcophagus – I always remembered the Mummy coming out of the coffin in the Scooby-Doo cartoons when I was a child, how cool would it be to make your own.

So this summer I had a play with some cardboard & foil and made up a model to show the kids. Lyn has done lots of research too, so hopefully we will be able to show the art club some great pictures to get their imaginations fired up.

The model in the photo is not finished as it needs a colourful painting of an Egyptian mask on the lid and some gold paint to decorate the inside of the Sarcophagus.

I will post some more pics when the children start to make theirs.

Read Full Post »

Kandinsky inspired tree

This is a simple but striking project children will love. A tree trunk with 5 branches is painted using black poster paint onto an A3 piece of cartridge paper. Circles of card are cut out in different sizes and colours and glued concentrically (with their centres in the same place) on the branches giving the impression of colourful leaves.

This is a great project for children to experiment with complimnetary colours.

Read Full Post »